scandipwa/menu-organizer 2.1.5

Scandiweb Menu Organizer for ScandiPWA

Type

magento2-module

License

OSL-3.0

Requires
Requires (dev)

None

Suggests

None

Provides

None

Conflicts

None

Replaces

None

ScandiPWA_MenuOrganizer

This repository is a module for Magento 2. This module is used to create customized navigation.

Menu

  1. Supported features
  2. Installation
  3. How to use
    3.1. Creating first menu
    3.2. Adding menu items
    3.3. Structure for ScandiPWA
    3.4. How to enable/disable menu per store
  4. For development
    4.1. DB structure
    4.2. GraphQl structure

4.3. Quick file access

1. Supported features

  • Multilevel structured menu
  • Magento categories
  • Magento CMS pages
  • Custom URLs
  • Icons for menu items

* Custom CSS classes

2. Installation

Installation via composer:

composer require scandipwa/menu-organizer

3. How to use

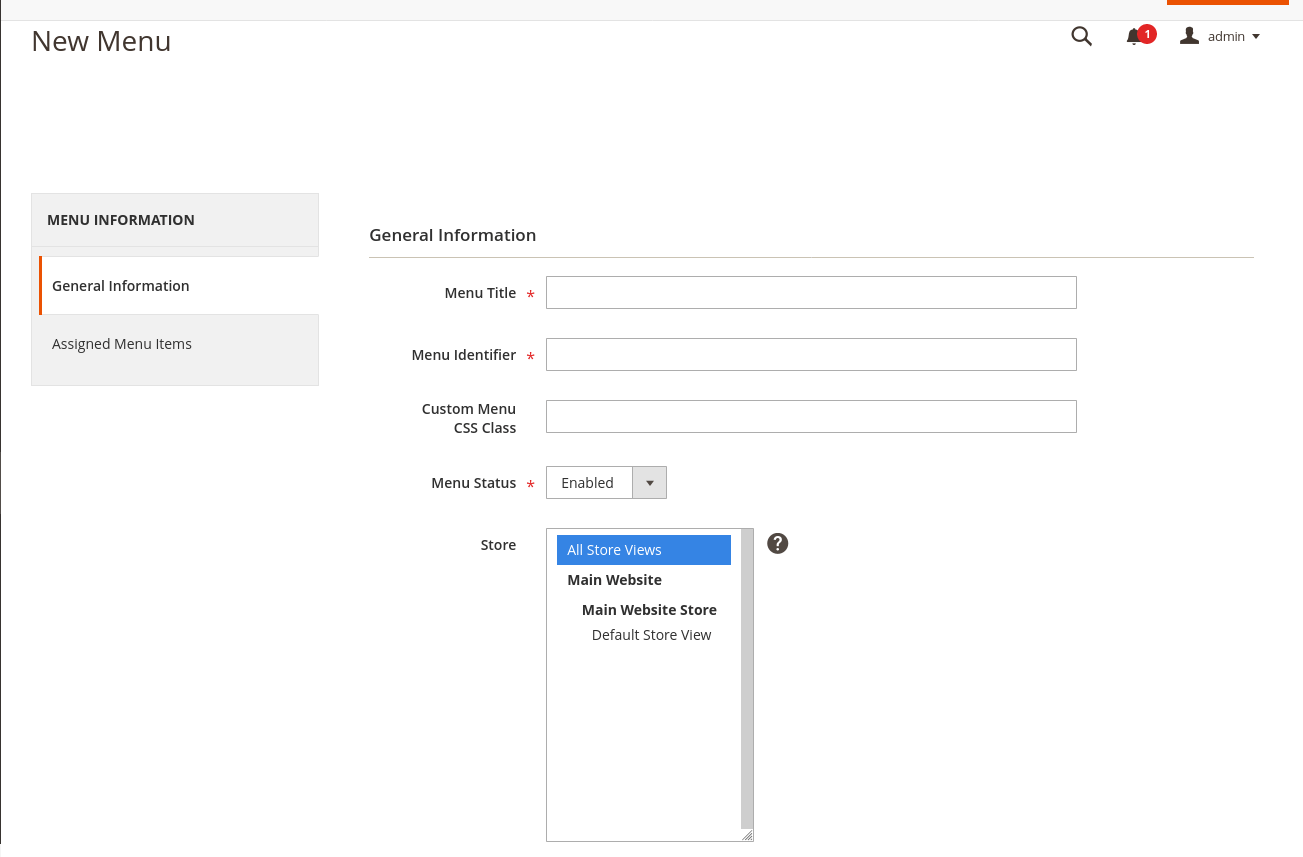
3.1. Creating first menu

  1. Open admin panel
  2. Locate admin/scandipwa_menuorganizer/menu via URL or by using side panel menu: Scandiweb -> Navigation -> MenuManager
  3. Find Add New Menu button in the right top corner, click it.
  1. Fill out form fields:
    1. Required:
      • Title
      • Menu identifier (used in graphql requests)
      • Menu status (enabled / disabled)
    2. Optional:
      • Custom Menu CSS Class
      • Store (to which store-view this menu is assigned to)
  2. Click Save.

image

3.2. Adding menu items

  1. Open menu.
  2. Find the Assigned Menu Items in the navigation on the left. click it.
  3. Click Add item in the top right corner.
  4. Fill out form fields:
    1. Required:
      • Menu Item Title
      • URL Type (Custom URL / Category / CMS page)
      • URL Type specific field: Custom URL | Category | CMS Page
      • Parent (Parent menu item)
      • Menu Item Status (enabled / disabled)
    2. Optional:
      • Menu Item CSS Class
      • URL Attributes
      • Icon
      • Icon Alt Text
      • Menu Item Sort Order (Item with lowest number will be on top)
  5. Click Save.

image

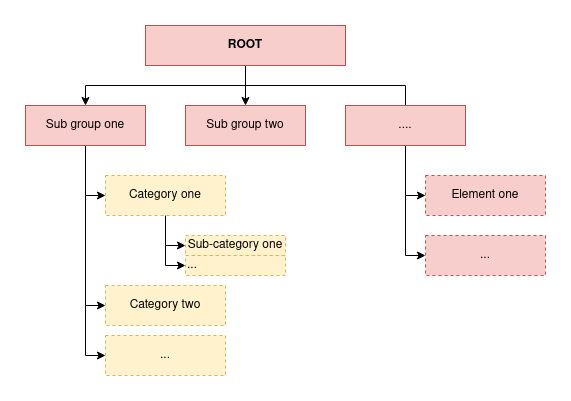
3.3. Structure for ScandiPWA

By default ScandiPWA will only render yellow elements (check image) and ignore the red ones.
image

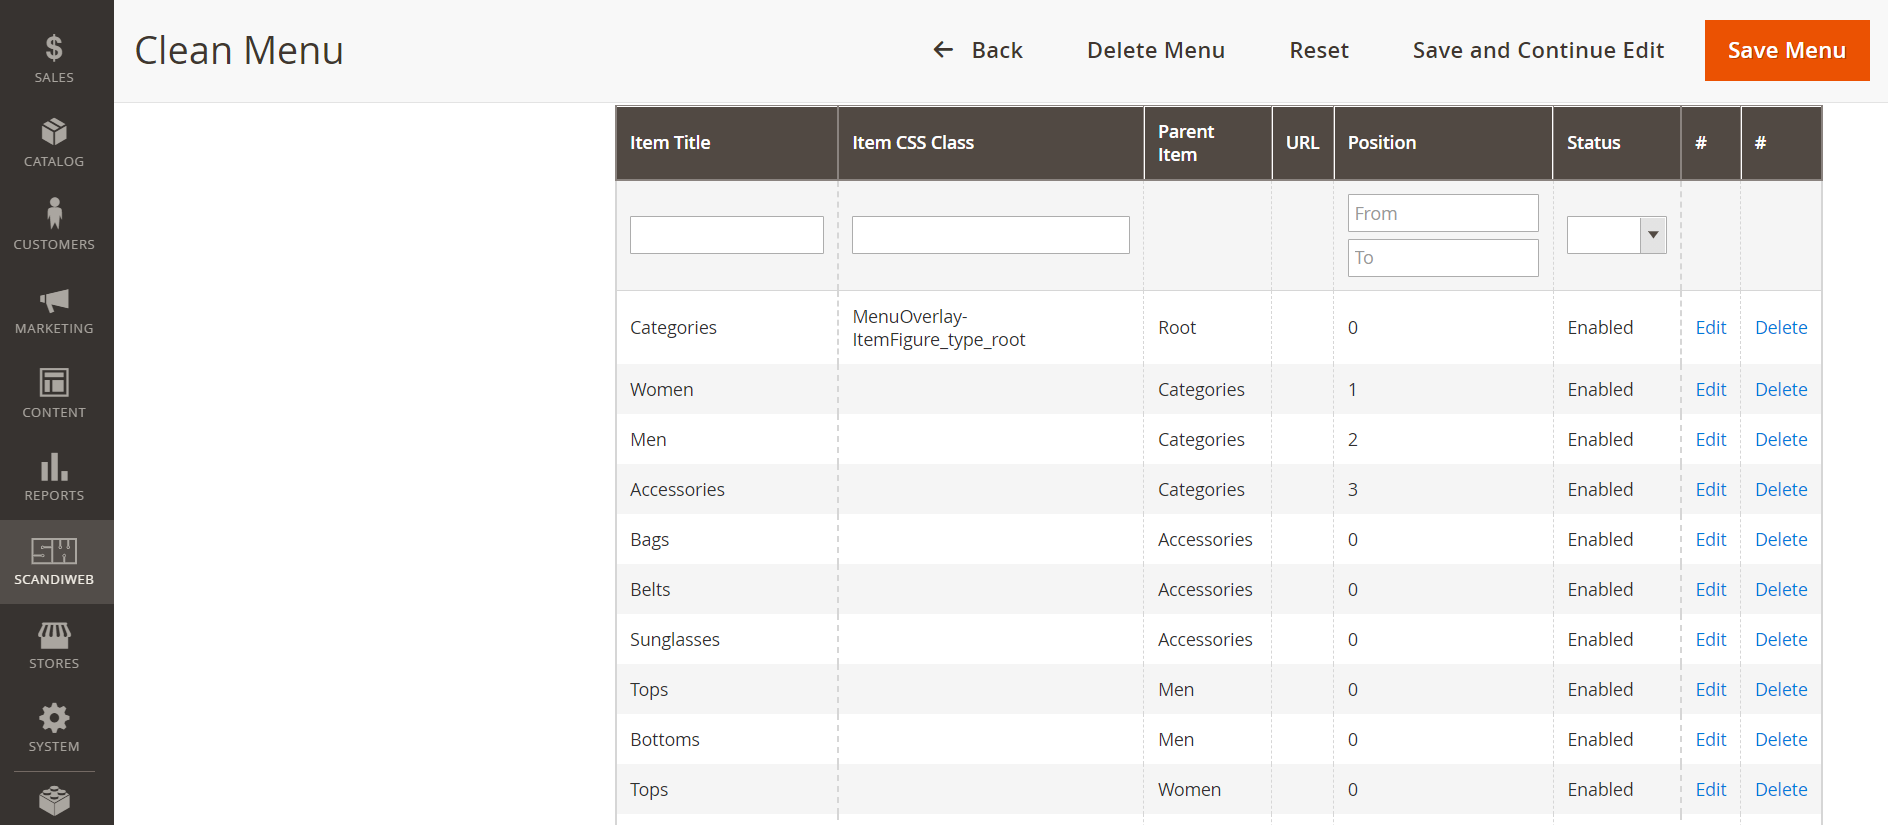
The example below would result in a menu with the options Women, Men and Accessories and their respective sub-items (such as Bags and Tops).
image

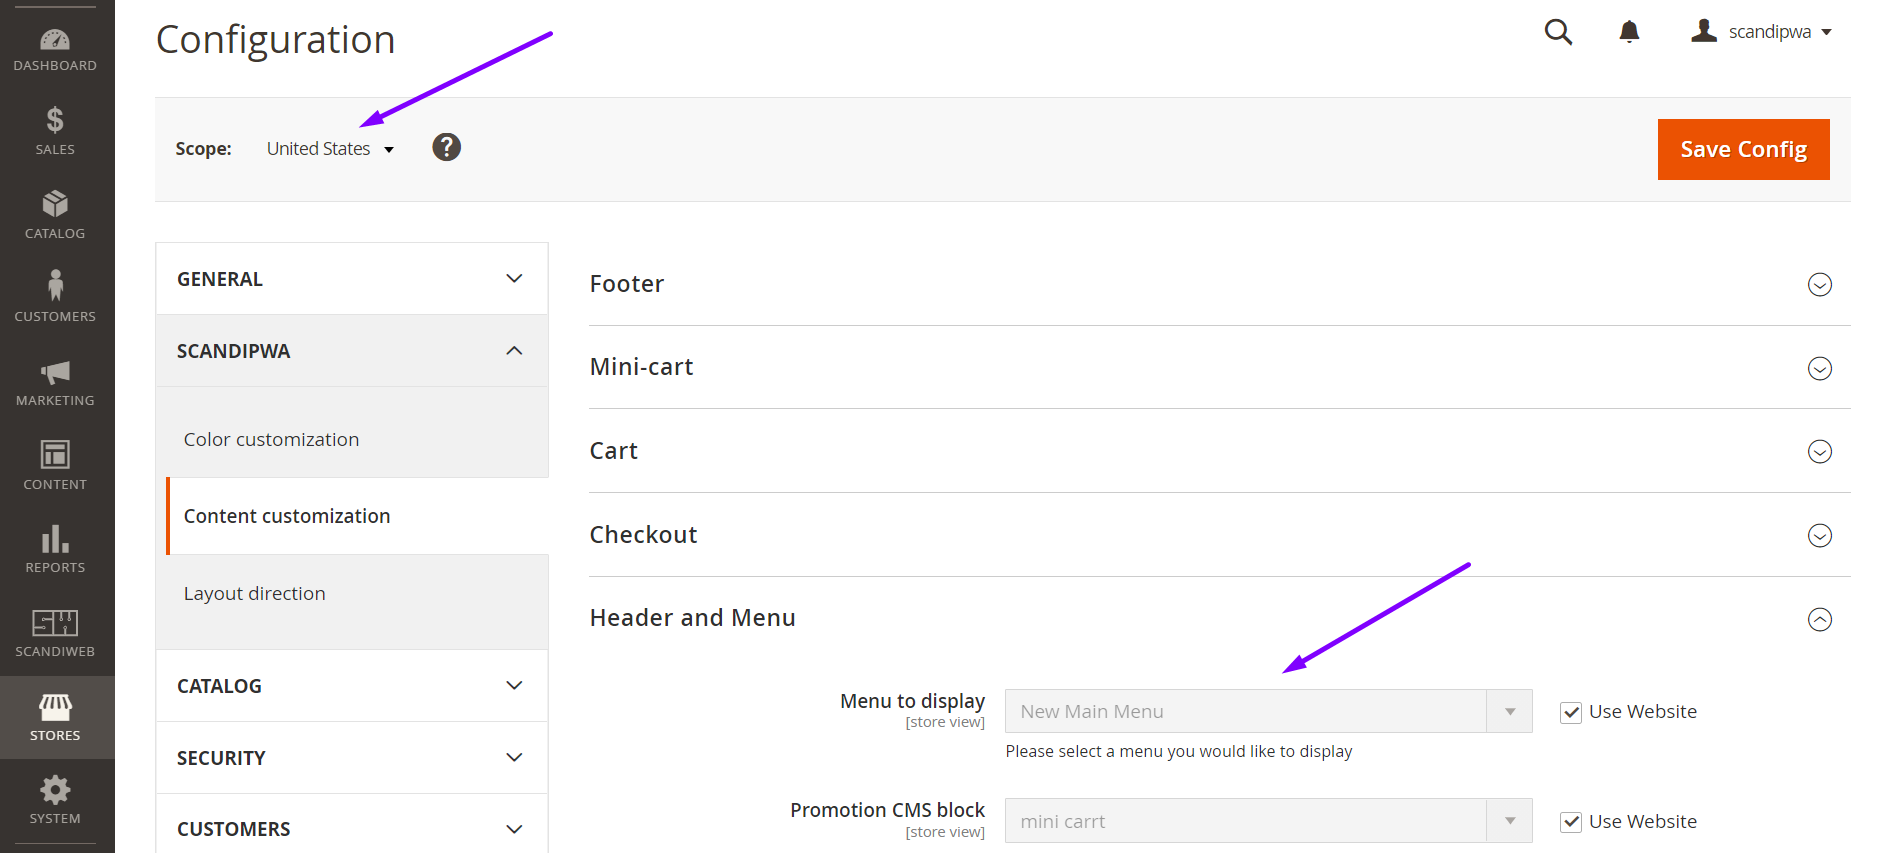
3.4. How to enable/disable menu per store

To enable a menu for a specific store, make sure you have selected the store in the menu configuration on step 3.1.4.ii.
Then, select the correct menu id in the configuration:

  1. Open admin panel
  2. Using the side panel menu, go to: Stores -> Settings -> Configuration
  3. Find Scope and select the desired store view.
  4. Using the menu dropdown, go to: ScandiPWA -> Content Customization -> Header and Menu
  5. Uncheck the checkbox Use Website
  6. Select the desired menu in Menu to display
  7. Tap Save Config
  8. Flush Cache Storage

image


4. For development

4.1. DB structure

image

4.2. GraphQl structure

type Query {
    scandiwebMenu(identifier: String!): Menu @resolver(class: "ScandiPWA\\MenuOrganizer\\Model\\Resolver\\Menu")
}

type Menu {
    menu_id: ID 
    title: String 
    is_active: Boolean 
    css_class: String 
    items: [Item]
}

type Item  {
    item_id: ID 
    icon: String
    title: String 
    item_class: String @doc(description: "CSS class of the item")
    parent_id: Int 
    url: String 
    url_type: Int @doc(description: "0 - regular link, 1 - cms page, 2 - category")
    position: Int 
    is_active: Boolean 
    cms_page_identifier: String 
    is_promo: Int @doc(description: "Boolean if category is promotional category")
    promo_image: String @doc(description: "Promo category image background")
    category_id: Int @doc(description: "Category id")
}

Or check: schema.graphqls

4.3. Quick file access: